SOHO : Small Office Home Office
Freeware - Opensource software tips, tricks, tweaks & fixes for managing, securing, improving the performance of SOHO Desktop, Laptop, Networks

Monday, July 5, 2010

How to setup Webmin in SSL mode (https)?


Because your Webmin login and password are normally passed between your browser and the server in unencrypted form, an attacker with access to any of the networks between the browser and server can easily capture your Webmin login. To prevent this, Webmin can be configured to use SSL to encrypt all of its network traffic.

Running Webmin in SSL mode

To install SSL, follow these steps :


  1. Download the OpenSSL library
    OpenSSL is a C library that provides the underlying SSL functions used by Webmin and many other programs. It is available in RPM format and as a .tar.gz file. When installing from the RPM, you may also need thedevelopment RPM in order to compile Net::SSLeay. 
    Most Linux and BSD distributions now come with OpenSSL RPMs that are installed as standard or available on the CD. If your distribution hasopenssl and possibily openssl-devel packages, use them instead.

  2. Install the OpenSSL library
    If you are installing from the RPM, run the commands :
      rpm -i openssl-0.x.y.rpm
      rpm -i openssl-devel-0.x.y.rpm

    If installing from the source, you will need to compile and install it with the commands :
      tar xvzf openssl-0.x.y.tar.gz
      cd openssl-0.x.y
      ./Configure     (or ./config in new OpenSSL versions)
      make
      make install
  3. Download the Net::SSLeay Perl module
    Net::SSLeay is a module that allows Perl scripts to call the functions in the OpenSSL library. It is available in .tar.gz format from the Webmin siteor from the CPAN Perl module archive
    Alternately, you can use the Perl Modules module in Webmin to download an install Net::SSLeay from CPAN. If this works OK, the next step can be skipped. 
    Some Linux distributions come with an RPM package containing this Perl module, often named perl-Net-SSLeay. If one is available, install it instead of compiling the module manually. You may also be able to find a suitable package at rpmfind.net if your distribution doesn't include one. However, be aware that any Perl module in RPM format must have been built for the same version of Perl that you are running, or it won't work.

  4. Install the Net::SSLeay module
    To install the module, use the commands :
      tar xvzf Net_SSLeay.pm-x.yy.tar.gz
      cd Net_SSLeay.pm-x.yy
      perl Makefile.PL
      make install

    If you have installed OpenSSL from the RPM, you may need to run perl Makefile.PL /usr in order to find the OpenSSL library properly.

  5. Test the SSL install
    If the command perl -e 'use Net::SSLeay'doesn't output any error message, then the SSL support that Webmin needs is properly installed.

  6. If Webmin is not installed yet, install it
    If you install SSL support first, when Webmin'ssetup.sh script is run it will ask you if you want to enable SSL. Just enter y. The RPM version of Webmin will always automaticlly use SSL mode if possible.

  7. If Webmin is already installed, turn on SSL
    In the Webmin Configuration module (under the Webmin category) an icon for SSL Encryption should appear. Click on it, and change the SSL option from Disabled toEnabled.
Continue Reading...

Installing webmin on 64 bit centos 5.x

We use CentOS for our web servers, and favor Webmin as a way to administer our servers. To install Webmin via yum on CentOS, follow these steps as root or sudo, from the command line (via SSH or at the console). These steps will also work for RedHat servers.

Configure the Webmin repository and install
Webmin is not available via yum in the default CentOS repository. Follow these steps to add the Webmin repository (repo) from Webmin.com.
  1. Create and edit the repository file # nano /etc/yum.repos.d/webmin.repo
  2. Add the [Webmin] section (listed below) to the new repository file
  3. Save the new file
  4. Import the public key: # rpm --import http://www.webmin.com/jcameron-key.asc
  5. Install webmin: # yum install webmin
Open the Firewall
If your server is protected by a firewall, you won't be able to access Webmin until you open port 10000. Use these steps on CentOS
  1. Backup the current firewall settings: # cp /etc/sysconfig/iptables /etc/sysconfig/iptables.bak
  2. Install the Red Hat firewall configuration tool # yum install system-config-securitylevel
  3. Run the firewall tool: system-config-securitylevel
  4. Select _Security Level:_ *Enabled*
  5. Click [Customize]
  6. Check incoming ports to allow (probably SSH, WWW, Secure WWW, and FTP)
  7. _Other Ports_ 10000:tcp
  8. Click [OK]
This will save your new settings and reload the firewall. You won't have to use this command line firewall tool again, as now you can use Webmin to configure the firewall.


Test Webmin

Now that you've installed Webmin and opened the Webmin port, test it out. Open your favorite brower and type your server's IP address followed by :10000, like this:
168.192.1.1:10000
The Webmin login screen should appear. Log in with your root credentials. It's a good idea to set up another Webmin user so you don't have to use your root credentials


Webmin repo section
[Webmin]
name=Webmin Distribution Neutral
baseurl=http://download.webmin.com/download/yum
enabled=1


To enable ssl / https for webmin follow this post
Continue Reading...

How Network Traffic Flows?


How Network Traffic Flows – Getting StartedGideon T. Rasmussen - CISSP, CFSO, CFSA, SCSA

To troubleshoot an issue, you need to know how network traffic flows under normal circumstances. This article details what happens when a Web browser is used to access a Web site.

Once the Web site name is entered into a Web browser, a series of communications occurs over various protocols. The table below represents how the network traffic flows:
Line:
Protocol:
Source:
Destination:
Data:
1
ARP
10.0.1.13
Broadcast
Who has 10.0.1.1? Tell 10.0.1.13
2
ARP
10.0.1.1
10.0.1.13
10.0.1.1 is at 00:80:c8:57:d3:aa
3
DNS
10.0.1.13
10.0.1.1
Standard query A www.cyberguard.com
4
DNS
10.0.1.1
10.0.1.13
Standard query response CNAME cyberguard.com A 64.94.50.88
5
TCP
10.0.1.13
64.94.50.88
1939 > http [SYN]
6
TCP
64.94.50.88
10.0.1.13
http > 1939 [SYN, ACK]
7
TCP
10.0.1.13
64.94.50.88
1939 > http [ACK]
8
HTTP
10.0.1.13
64.94.50.88
GET / HTTP/1.1
9
HTTP
64.94.50.88
10.0.1.13
HTTP/1.1 200 OK
10
HTTP
64.94.50.88
10.0.1.13
HTTP Continuation
11
TCP
10.0.1.13
64.94.50.88
2577 > http [ACK] Seq=388864 Ack=37076821 Win=8241 Len=0
12
TCP
10.0.1.13
64.94.50.88
2577 > http [RST] Seq=388864 Ack=37077089 Win=0 Len=0
The ARP Protocol
Before systems can communicate, they need to know each other’s hardware addresses. The Address Resolution Protocol (ARP) is used for this purpose. From its configuration, the workstation knows the IP address of the DNS server.
Line # 1
Protocol:Source:Destination:Data:
ARP10.0.1.13BroadcastWho has 10.0.1.1? Tell 10.0.1.13
The workstation broadcasts a request to the devices on its network asking “who has” the IP address it needs to communicate with.
Line # 2
Protocol:Source:Destination:Data:
ARP10.0.1.110.0.1.1310.0.1.1 is at 00:80:c8:57:d3:aa
The remote system responds providing its hardware address. Now that the workstation knows the hardware address of the remote system, it can communicate with it.
The DNS ProtocolThe Domain Name System (DNS) protocol is used to resolve system names to IP addresses. When a Web site name is entered into a browser, the workstation needs to know the corresponding IP address to reach the Web server hosting the site.
Line # 3
Protocol:Source:Destination:Data:
DNS10.0.1.1310.0.1.1Standard query A www.cyberguard.com
The workstation asks the DNS server to provide the IP address of the Web server hosting www.cyberguard.com.
Line # 4
Protocol:Source:Destination:Data:
DNS10.0.1.110.0.1.13Standard query response CNAME cyberguard.com A 64.94.50.88
The DNS server responds with the IP address corresponding to www.cyberguard.com.
The TCP Protocol
The Transmission Control Protocol (TCP) protocol is used to transfer data. These next three lines comprise the TCP three-way handshake:
Line # 5
Protocol:Source:Destination:Data:
TCP10.0.1.1364.94.50.881939 > http [SYN]
The workstation initiates the connection to the Web server (SYN). SYN is an abbreviation for “synchronize.”
Line # 6
Protocol:Source:Destination:Data:
TCP64.94.50.8810.0.1.13http > 1939 [SYN, ACK]
The Web server responds back indicating that it is ready for transmission (SYN ACK). SYN ACK is an abbreviation for “synchronize acknowledgement.”
Line # 7
Protocol:Source:Destination:Data:
DNS10.0.1.1364.94.50.881939 > http [ACK]
The workstation sends to the Web server indicating that it is starting to send traffic (ACK). This acknowledgement indicates that the TCP connection is established and traffic can begin to flow.
The HTTP Protocol
The Hyper Text Transfer Protocol (HTTP) is used to serve up Web pages. You can see evidence of this from the Web site address in your browser (i.e. http://www.cyberguard.com).
Line # 8
Protocol:Source:Destination:Data:
HTTP10.0.1.1364.94.50.88GET / HTTP/1.1
The browser opens a connection to the Web server.
Line # 9
Protocol:Source:Destination:Data:
HTTP64.94.50.8810.0.1.13HTTP/1.1 200 OK
The Web server accepts the connection.
Line # 10
Protocol:Source:Destination:Data:
HTTP64.94.50.8810.0.1.13HTTP Continuation
The HTTP Continuation lines represent where the contents of the html page are sent over. It includes text, links, etc.
Back to the TCP Protocol
Line # 11
Protocol:Source:Destination:Data:
TCP10.0.1.1364.94.50.882577 > http [ACK] Seq=388864 Ack=37076821 Win=8241 Len=0
This line is actually repeated four times. The workstation is acknowledging the last packet.
Line # 12 (RST)
Protocol:Source:Destination:Data:
TCP10.0.1.1364.94.50.882577 > http [RST] Seq=388864 Ack=37077089 Win=0 Len=0
The workstation sends a reset, effectively tearing down the TCP connection.
Tcpdump and Ethereal
It is important to note that the tcpdump will provide different details depending on where it runs on your network. In this example, tcpdump was run on the internal interface of the firewall with a directly connected workstation. If tcpdump were used to monitor the same traffic flow on the external interface, the source IP address would appear as the external interface of the firewall, providing that Dynamic Network Address Translation (DNAT) was in place. To observe how proxy traffic flows, it makes sense to run tcpdump on both the internal and external interfaces, as the proxy acts as a middleman between the source and destination.
The source of the table was a tcpdump file viewed through Ethereal. The exact syntax used was: “tcpdump -vvpni dec1 -s1514 -w /archive2/dec1.dmp host 10.0.1.13”. The tcpdump command has extensive options for recording very specific traffic flow (i.e. source/destination, ports, and Boolean expressions). For more information, enter “man tcpdump” on the command line. The Windows version is Windump (http://windump.polito.it).
Ethereal is a good tool to view tcpdump files. It is freely available from http://www.ethereal.com.
Some of the ports present in a tcpdump may be unfamiliar to you. The most current list of port numbers can be found at http://www.iana.org/assignments/port-numbers (per RFC 3232).

Continue Reading...

Thursday, July 1, 2010

How To Redirect Blogger URL To Another URL?

This post explains how to redirect your blogger (blogspot) blog/website traffic from one url(address) to another:-

1.Log in to your dashboard--> layout- -> Edit HTML

2.Scroll down to where you see <head> tag.

3.Add below code into your template

just after the <head> tag.
<meta http-equiv="refresh" content="0;url=http://yournewurl.com"/>
4.Replace http://yournewurl.com with the URL you want to redirect your old blog.

5.Click on Save Templates and you are done.

Now your blog traffic will be redirected to your new address.


Continue Reading...

Wednesday, June 16, 2010

Configure TCP/IP from command line

In order to configure TCP/IP settings such as the IP address, Subnet Mask, Default Gateway, DNS and WINS addresses and many other options you can use Netsh.exe.


Netsh.exe is a command-line scripting utility that allows you to, either locally or remotely, display or modify the network configuration of a computer that is currently running. Netsh.exe also provides a scripting feature that allows you to run a group of commands in batch mode against a specified computer. Netsh.exe can also save a configuration script in a text file for archival purposes or to help you configure other servers.

Netsh.exe is available on Windows 2000, Windows XP and Windows Server 2003.
You can use the Netsh.exe tool to perform the following tasks:
  • Configure interfaces
  • Configure routing protocols
  • Configure filters
  • Configure routes
  • Configure remote access behavior for Windows-based remote access routers that are running the Routing and Remote Access Server (RRAS) Service
  • Display the configuration of a currently running router on any computer
  • Use the scripting feature to run a collection of commands in batch mode against a specified router.

What can we do with Netsh.exe?

With Netsh.exe you can easily view your TCP/IP settings. Type the following command in a Command Prompt window (CMD.EXE):
netsh interface ip show config
With Netsh.exe, you can easily configure your computer's IP address and other TCP/IP related settings. For example:
The following command configures the interface named Local Area Connection with the static IP address 192.168.0.100, the subnet mask of 255.255.255.0, and a default gateway of 192.168.0.1:
netsh interface ip set address name="Local Area Connection" static 192.168.0.100 255.255.255.0 192.168.0.1 1
(The above line is one long line, copy paste it as one line)
Netsh.exe can be also useful in certain scenarios such as when you have a portable computer that needs to be relocated between 2 or more office locations, while still maintaining a specific and static IP address configuration. With Netsh.exe, you can easily save and restore the appropriate network configuration.

First, connect your portable computer to location #1, and then manually configure the required settings (such as the IP address, Subnet Mask, Default Gateway, DNS and WINS addresses).


Now, you need to export your current IP settings to a text file. Use the following command:
netsh -c interface dump > c:'location1.txt
When you reach location #2, do the same thing, only keep the new settings to a different file:
netsh -c interface dump > c:'location2.txt
You can go on with any other location you may need, but we'll keep it simple and only use 2 examples.
Now, whenever you need to quickly import your IP settings and change them between location #1 and location #2, just enter the following command in a Command Prompt window (CMD.EXE):
netsh -f c:'location1.txt
or
netsh -f c:'location2.txt
and so on.
You can also use the global EXEC switch instead of -F:
netsh exec c:'location2.txt
Netsh.exe can also be used to configure your NIC to automatically obtain an IP address from a DHCP server:
netsh interface ip set address "Local Area Connection" dhcp
Would you like to configure DNS and WINS addresses from the Command Prompt? You can. See this example for DNS:
netsh interface ip set dns "Local Area Connection" static 192.168.0.200
and this one for WINS:
netsh interface ip set wins "Local Area Connection" static 192.168.0.200
Or, if you want, you can configure your NIC to dynamically obtain it's DNS settings:
netsh interface ip set dns "Local Area Connection" dhcp
BTW, if you want to set a primary and secondary DNS address, add index=1 and index=2 respectively to the lines of Netsh command.
As you now see, Netsh.exe has many features you might find useful, and that goes beyond saying even without looking into the other valuable options that exist in the command.

Setting up multiple DNS servers from command line with netsh.exe
netsh interface ip set dns local static 188.40.157.19 
netsh interface ip add dns local 208.67.222.222
netsh interface ip add dns local 208.67.220.220
Continue Reading...

Friday, June 11, 2010

Synchronize files with Unison


Synchronize files with Unison


Unison is a file synchronization tool that allows users to maintain two instances of a given file set on two systems up to date and identical. The tool is designed for maximum usability in a variety of contexts and uses protocols like SSH to securely transfer data between folders. Furthermore, the system is designed to be fault tolerant in the case of interruptions and modifications to both "source" and "remote," and aims to always leave both instances of a file or directory tree in a known working state. Unison can be deployed to synchronize files between systems running disparate operating systems, to backup systems, or as part of a content deployment system, among a plethora of other use cases.
Before beginning this guide, we assume you have completed the getting started guide. If you're new to Linux system administration, we recommend considering the guides in our using Linux series, particularly the administration basics guide. If you're simply looking to gain access to your Linode on your local system, you may want to consider deploying a remote file system. Conversely, if you need a more complex backup system, your needs may be better served by an incremental backup system.
These instructions work with the Linode platform. If you don't have a Linode yet, sign up for a Linux VPS and get started today.
Contents
Installing Unison on a Linode
Debian 5 (Lenny)
Ubuntu 9.10 (Karmic)
CentOS 5
Fedora
Arch Linux
Installing Unison on Local Machines
More Information
License

Installing Unison on a Linode 


Debian 5 (Lenny) 

Begin by installing the required software for Unison on the remote machine. Issue the following sequence of commands to ensure that your system's package database is up to date, that all installed packages are up to date, and install Unison:
apt-get update
apt-get upgrade
apt-get install unison
Debian also includes packages for Unison version 2.13 (packaged as unison2.13.16) if you need to use this older version of the software to interact with a specific client. Otherwise, install the more recent version of Unison, packaged as unison.

Ubuntu 9.10 (Karmic) 

Edit the /etc/apt/sources.list to enable to the Universe repositories, so that it resembles the following:
File: /etc/apt/sources.list
## main & restricted repositories
deb http://us.archive.ubuntu.com/ubuntu/ karmic main restricted
deb-src http://us.archive.ubuntu.com/ubuntu/ karmic main restricted

deb http://security.ubuntu.com/ubuntu karmic-security main restricted
deb-src http://security.ubuntu.com/ubuntu karmic-security main restricted

## universe repositories
deb http://us.archive.ubuntu.com/ubuntu/ karmic universe
deb-src http://us.archive.ubuntu.com/ubuntu/ karmic universe
deb http://us.archive.ubuntu.com/ubuntu/ karmic-updates universe
deb-src http://us.archive.ubuntu.com/ubuntu/ karmic-updates universe

deb http://security.ubuntu.com/ubuntu karmic-security universe
deb-src http://security.ubuntu.com/ubuntu karmic-security universe
Finally, issue the following sequence of commands to: ensure that your system's package database is up to date, that all installed packages are up to date, and install Unison:
apt-get update
apt-get upgrade
apt-get install unison

CentOS 5 

The unison packages for CentOS are not included in the base distribution, but are included in the EPEL repositories. Enable the EPEL repository, and ensure that your system is up to date and install unison with the following commands:
rpm -Uvh http://download.fedora.redhat.com/pub/epel/5/i386/epel-release-5-3.noarch.rpm
yum update
yum install unison227
The EPEL repository also includes a package for Unison version 2.13 in the unison213 package. This may be helpful if you need to use this version of the client, otherwise use the more recent version of the software.

Fedora 

On Fedora systems issue the following sequence of commands to ensure that your system is up to date and then install Unison:
yum update
yum install unison

Arch Linux 

Ensure that your local copy of the package database is up to date before installing Unison by issuing the following commands:
pacman -Sy
pacman -S unison

Installing Unison on Local Machines 

In order to function properly, the major and minor version numbers of Unison used by the remote and local system must match. Test the version of Unison that was installed by the package manager on your Linode by issue the following command:
unison -version
Use the information provided by the output of this command to aid in your decision on the appropriate version of your client.
If you are running a Linux-based system on your local machine you can install unison tools using the above procedures. If you're running Debian or Ubuntu systems, you can issue the following command to install a graphical front-end for Unison:
apt-get install unison-gtk
Debian 5 (Lenny) also includes a graphical user interface for Unison version 2.13, packaged as "unison2.13.16-gtk".
If you're running OS X or Windows, download an appropriate Unison client. When successfully installed, provide the client with the resolvable address of the remote server, SSH keys or other authentication credentials, and the absolute paths to the local and remote folders that you want to synchronize. From now on, when you run Unison from the client app, changes to either or both of the specified file systems will be updated and reflected in both instances. Congratulations!

More Information 

You may wish to consult the following resources for additional information on this topic. While these are provided in the hope that they will be useful, please note that we cannot vouch for the accuracy or timeliness of externally hosted materials.

Continue Reading...

Tuesday, June 1, 2010

Embed photos from picasa web albums

Embed Photos from Picasa Web Albums
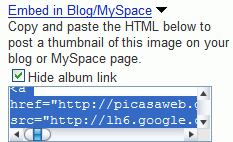
Picasa Web Albums is probably the best way to view a photo album online, but did you know you can embed those photos into a site? Next to each photo, Google shows a link that reads "Embed in Blog/MySpace". Check "Hide album link" and copy the HTML code.


You'll notice a link similar to this one:
http://lh6.google.com/image/[username]/[id1]/[id2]/[id3]/s288/name.jpg

Google resizes your photo to 288 pixels width. But that's pretty small, I hear you saying. The nice thing is that you can change the width, but only to fixed values. Here's a list of numbers you can use to replace 288:
72, 144, 200, 320, 400, 512, 576, 640, 720, 800, 912, 1024, 1152, 1280, 1440, 1600.

If you want to place a direct link to a photo, you can use 1600, as this seems to be the biggest value.
Continue Reading...